
项目起航:项目初始化与配置
更新时间: 2022-02-09 16:08:20
# 用 Create React App 初始化项目
Create React App 是一种官方支持的创建单页 React 应用程序的方式。它提供了一个没有配置的现代构建设置。 其基本使用方式如下:
npx create-react-app my-app
1
这个项目需要用到TypeScript,所以我们这样创建项目:
npm create-react-app jira --template typescript
1
提示
npx 可以直接使用npm包,而不用全局手动去安装
# 项目目录结构
├── node_modules (依赖安装在这里)
├── public (不参与打包的公共文件在这)
|    ├── favicon.ico
|    ├── index.html
|    ├── logo192.png
|    ├── logo512.png
|    ├── manifest.json
|    └── robots.txt (配置搜索引擎的)
├── src
|    ├── App.css
|    ├── App.test.tsx
|    ├── App.tsx
|    ├── index.css
|    ├── index.tsx (入口文件)
|    ├── logo.svg
|    ├── react-app-env.d.ts
|    ├── reportWebVitals.ts (做埋点上报)
|    └── setupTests.ts (用来配置单元测试)
├── .gitignore
├── package.json
├── README.md
├── tsconfig.json (配置ts的)
└── package-lock.json
1
2
3
4
5
6
7
8
9
10
11
12
13
14
15
16
17
18
19
20
21
22
23
2
3
4
5
6
7
8
9
10
11
12
13
14
15
16
17
18
19
20
21
22
23
# 配置tsconfig.json
每次引入文件的时候写相对路径太麻烦了,如何改成绝对路径呢,配置一下tsConfig.json:
{
  "compilerOptions": {
    "baseUrl":"./src",
    "target": "es5",
    "lib": [
      "dom",
      "dom.iterable",
      "esnext"
    ],
    "allowJs": true,
    "skipLibCheck": true,
    "esModuleInterop": true,
    "allowSyntheticDefaultImports": true,
    "strict": true,
    "forceConsistentCasingInFileNames": true,
    "noFallthroughCasesInSwitch": true,
    "module": "esnext",
    "moduleResolution": "node",
    "resolveJsonModule": true,
    "isolatedModules": true,
    "noEmit": true,
    "jsx": "react-jsx"
  },
  "include": [
    "src"
  ]
}
1
2
3
4
5
6
7
8
9
10
11
12
13
14
15
16
17
18
19
20
21
22
23
24
25
26
27
28
2
3
4
5
6
7
8
9
10
11
12
13
14
15
16
17
18
19
20
21
22
23
24
25
26
27
28
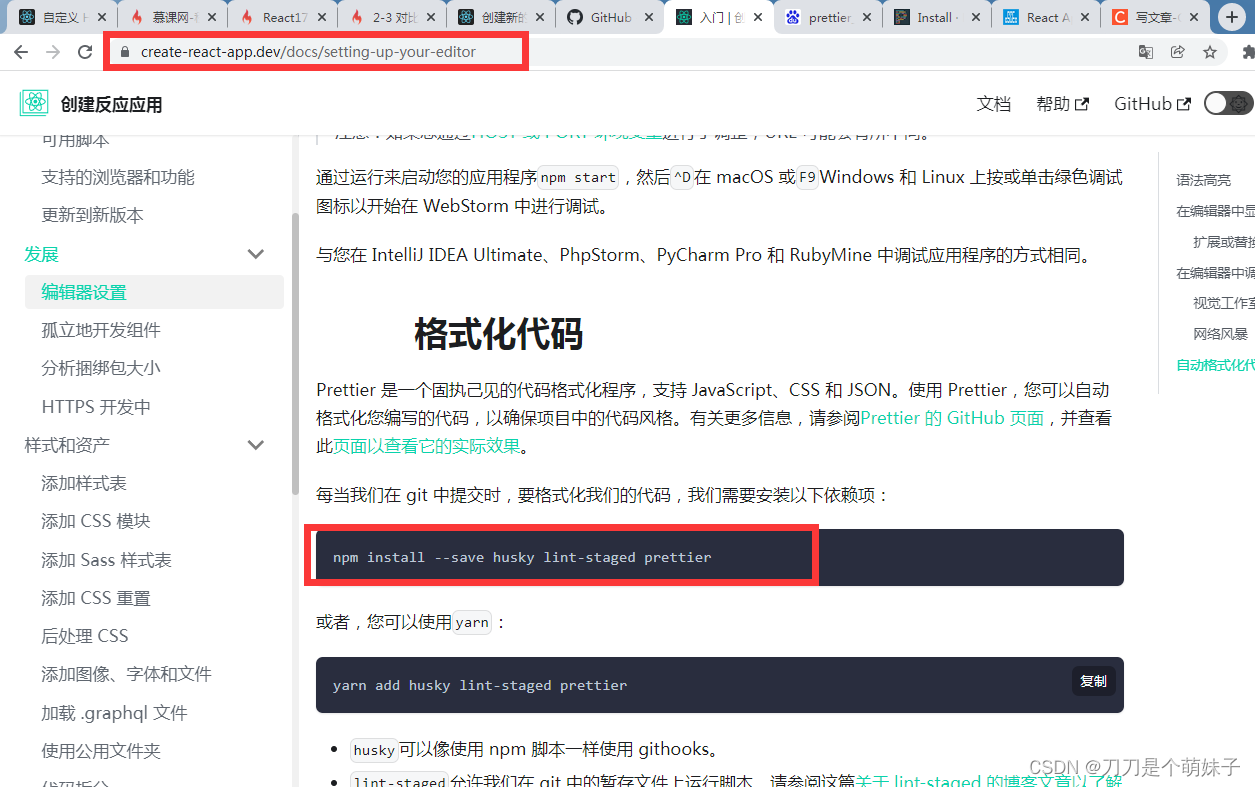
# 配置代码格式化
这个功能其实create-react-app官网上有提到的,我们就按照官网上介绍的来:
# 配置json-server
用本地node服务器json-server来模拟接口有以下优点:
- 配置简单,json-server 甚至可以 0 代码 30 秒启动一个 REST API Server。
- 自定义程度高,一切尽在掌控中。
- 增删改查真实模拟。
步骤:
- 安装json-server
npm install json-server -D
1
新建
__json_server_mock__\db.json文件package.json 的 script选项增加一行配置
{
  //...
  "script":{
    //.....
    "json-server": "json-server __json_server_mock__/db.json --watch"
  }
  //...
}
1
2
3
4
5
6
7
8
2
3
4
5
6
7
8
然后运行 npm run json-server 就可以启动mock的接口了
# json-server的使用
现在往db.json 中填入一些数据:
{
"posts": [
  { "id": 1, "title": "json-server", "author": "typicode" }
],
"comments": [
  { "id": 1, "body": "some comment", "postId": 1 }
],
"profile": { "name": "typicode" }
}
1
2
3
4
5
6
7
8
9
2
3
4
5
6
7
8
9
然后启动json-server,现在如果访问http://localhost:3000/posts/1 这个地址,会得到如下数据
{ "id": 1, "title": "json-server", "author": "typicode" }
1
- 如果你发出的是 POST, PUT, PATCH 或者 DELETE 请求,数据改变会使用 lowdb 自动的存到db.json中
- 您请求的body包含的对象格式应该像 GET 方式返回的那样 (例如: {"name":"Foobar"})
- id值是不可变的,任何PUT 和 PATCH 请求中尝试改变 id值都会被忽略。
- POST、PUT 或 PATCH 请求应包含Content-Type: application/json在请求正文中使用 JSON 的标头。否则它将返回 2XX 状态码,但不会对数据进行更改。